Previously, we've discussed various first layer problems, such as first layer roughness, 3D print warping, PLA not sticking to bed, and wavy ripples. Now, there's another new first layer problem worth mentioning, known as 'Elephant Foot'. Elephant foot is one of the most common issues in FDM 3D printing, typically occurring in the initial layer of the part. This term is derived from its resemblance to the shape of a real elephant's foot, attributed to the part's bottom bulging which is larger and wider than expected. This blog is going to discuss how to stop the 3D print elephant foot. We provide effective solutions for you, hoping they will be helpful.
What Causes Elephant Foot in 3D Printing?

Elephant foot is a 3D printing defect that not only damages the overall appearance but also decreases the parts' dimensional accuracy, making it more difficult to assemble and connect parts together. Therefore, it poses a serious issue in 3D printing, necessitating resolution. However, understanding its causes beforehand is also crucial.
Elephant foot arises from excessive pressure from the upper layers, pushing downward and causing the bottom layer to spread out to alleviate this pressure. Several factors contribute to this excessive pressure from the upper layers.
It is a common reason for your printer to be improperly calibrated, like an uneven printer bed or the nozzle being too close to the bed. Additionally, your heated bed temperature may be set too high, causing the bottom of the print to remain in a semi-molten state. If it is a larger print, pressure is added downward from the weight of the upper layers, leading to the compressing of the bottom layers into an elephant foot. Another possibility is over-extrusion on the first layer, causing the bottom of the model to get wider. This occurs due to an excessive amount of filament pushed out by the nozzle, resulting in an overly thick first layer that requires a longer cooling time. Insufficient cooling can contribute to the disposition of the elephant foot.
Recap the causes of 3D printer elephant foot:
- Uneven 3D printer bed
- Incorrect Z-axis offset
- Too hot the bed temperature
- Over-extrusion on the first layer
How to Fix Elephant Foot on A 3D Printer
1. Calibrate your 3D printer.
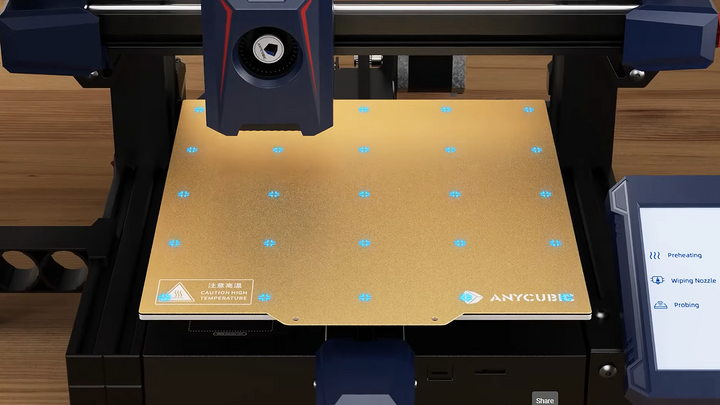
Leveling your printer bed is the first step in handling the elephant foot issue. If your printer features automatic bed leveling, that's ideal as it often takes only a few minutes. However, manual leveling might result in human errors, necessitating frequent adjustments and tests, which consume significant time and effort. If you're considering investing in a beginner-friendly 3D printer, Anycubic's Kobra 2 Neo is the best buy. The Kobra 2 Neo offers both an automatic bed leveling system and fast printing capabilities, reaching speeds of up to 250mm/s.
After adjusting the bed leveling, it's essential to check the Z-axis offset, which is the distance between the nozzle and the bed. If the nozzle gets too close to the bed, it may easily press down on the print, causing bugling elephant foot defects. You can adjust this automatically or manually, referring to the article "How to Tune 3D Printer Z-Offset" for more details.
2. Fix Over-Extrusion Issue.

Resolving over-extrusion can improve the elephant foot issue. You can check if the nozzle wear is causing excessive material extrusion. Also, adjusting the slicer settings to reduce the flow rate and lower the nozzle temperature can help control the material extrusion. If you're troubled by this issue, I suggest reading the article about "How to Prevent Over-Extrusion".
3. Lower the printer bed temperature.

Different materials require different heated bed temperatures, and incorrectly setting it may lead to the elephant foot problem. Filaments with lower melting points, such as PLA and TPU, often do not require very high bed temperatures, typically around 55-65°C. Conversely, high-temperature filaments like ABS require the bed to be set at 100-110°C. You can conduct a test by gradually lowering the bed temperature by 5°C each time until the bottom of the part is perfectly printed. If your bed temperature is correct, and the elephant foot issue still occurs, it might be caused by other reasons.
4. Use a raft for your model's bottom.

A raft is one of the strongest bed adhesion assistants, which can stop first-layer warping issues on your part and also minimize the elephant foot problem. As the elephant foot may transfer from the initial layers onto the raft, after printing, you simply remove and discard it. Finally, consider sanding the first layer of the print based on its appearance.
5. Add chamfers to your 3D model.
If the adjustments made previously to the machine and slicer settings don't work, you can modify a 3D model in a CAD program to place a 45° chamfer on the edges at the bottom of the model. "Chamfer" is a term in CAD, referring to a slope cut on a sharp edge, which can prevent elephant foot issues. Adding chamfers is also useful for improving 3D print overhangs.