In FDM 3D printing, regular replacement of aging or damaged parts of the 3D printer, particularly the extruder nozzle, is an essential and unavoidable maintenance task. As a crucial component, the nozzle wears out faster as the printing time increases. If you don't change the bad nozzle in a timely manner, this may result in various issues that negatively impact print quality, such as nozzle clogging, stringing and warping. When the nozzle tip is gradually becoming larger and shorter than its original size, it's a sign that it's time to change your nozzle. This article will guide you step by step on how to quickly and correctly replace your 3D printer nozzle.
Tools You'll Need:

- Pliers or wrench *1
- Socket *1
- Ratchet *1
- New nozzle *1
- Heat-resistant gloves *1
You should note that the nozzle types and sizes may vary, so it's important to use the appropriate socket size based on the nozzle size of your 3D printer. We take the example of Anycubic Vyper in this article, and we prepare a 7mm socket.
Before changing your 3D printer nozzle, ensure you are clear about how often to change it.
Step 1: Move Your Z-axis Up

To ensure a smoother nozzle replacement process, find and select the button of moving the Z-axis in your printer's control panel. In this case, the print head will raise up, typically to the home position where it's less likely to interfere with other components.
Step 2: Heat Up Your Printer
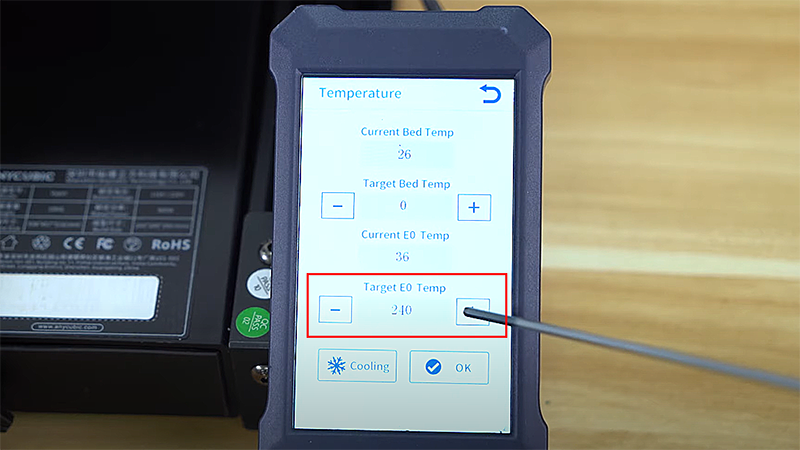
Turn on your 3D printer and preheat the hotend to the maximum temperature setting. This process helps to soften the filament, allowing for easier removal of the nozzle. As the nozzle is heating up, quickly unload the filament.
Step 3: Unscrew the Nozzle

Use pliers or a wrench to secure the heater block firmly in place while unscrewing the nozzle by a ratchet with a socket, ensuring stability and safety during replacing the nozzle. Be careful not to touch or damage any wires of the heater block when you loosen the nozzle. More importantly, be cautious as the nozzle is very hot. It's highly recommended to wear heat-resistant gloves.
Step 4: Install a New Nozzle

This step requires the same tools as the third step to tighten a new nozzle. You need to hold the heater block with a tool while slowly screwing the new nozzle by using a socket wrench. Be careful not to over-tighten it, as it could cause damage to the heater block and the surrounding wires.
Step 5: Check and Test the New Nozzle

Re-level the print bed before testing your new nozzle, because installing a nozzle may affect the distance between the nozzle and the bed. For FDM 3D printers like the Anycubic Kobra series, you can make this process easier by just pressing one button to automatically level the bed. After the bed calibration, feed the filament and check if it is extruding properly. If you experience nozzle clogging or filament leakage, it means that the new nozzle is not tightened enough. In that case, use a tool to tighten the nozzle further until it is resolved.