Belts are one of the most important moving parts in FDM 3D printers, and they will inevitably loosen and wear out after extended use, which affects the printing quality and results in slanted prints and 3d print ghosting. However, this is a common issue that can be resolved by routine maintenance or replacing parts. This guide will provide step-by-step instructions on how to replace the X-axis belt on Anycubic 3D printers. There is also another guide on the replacement of the Y-axis belt, which hopefully can assist you.
Tools you need:
- Allen keys
- New belts

Step 1: Use an M2.0 Allen wrench to unscrew the 2 screws at the rear of the X-axis motor cover, and set the cover aside.

Step 2: Use the M2.5 socket head cap screw wrench to unscrew the 2 screws that fix the X-axis tensioner.

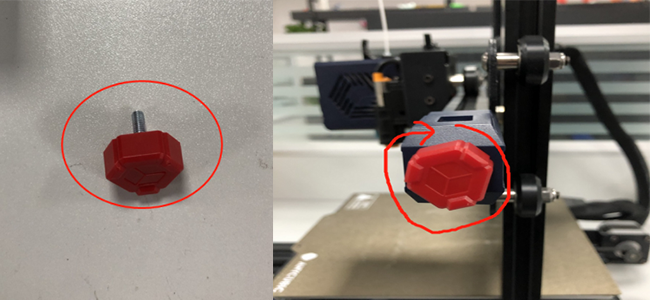
Step 3: Unscrew the nut for adjusting the belt tension in a counterclockwise direction and set it aside.
Step 4: Remove the belt from the sheet metal fixing on the print head module.
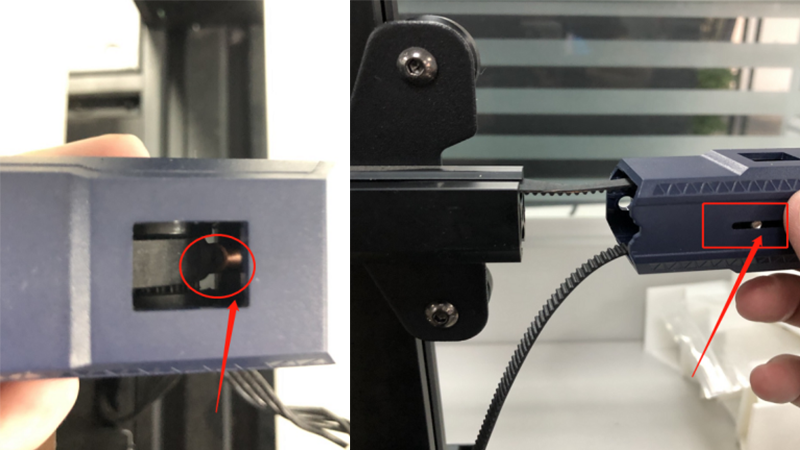
Step 5: Take the belt out of the X-axis tensioner. If the copper buckle is stuck in it, you can slightly move the pulley inside to allow more space for manipulation or use a wrench and other tools to assist in taking out the belt. Set the X-axis tensioner aside.

Step 6: Remove the printhead cable from the print head module, move the printhead module towards the direction of the X-axis tensioner, and remove it, and set it aside. Then remove the entire belt from the X-axis carriage.

Step 7: Install the new belt and lay the belt flat on the X-axis carriage.

Step 8: Move the printhead module from the X-axis tensioner position along the X-axis carriage groove.
*Notice: The belt must be under the two V-slot wheels above.

Step 9: Take the X-axis tensioner that was just put aside, and pass the belt through the X-axis tensioner. If it is stuck, it can be passed through the same method as when it was removed.

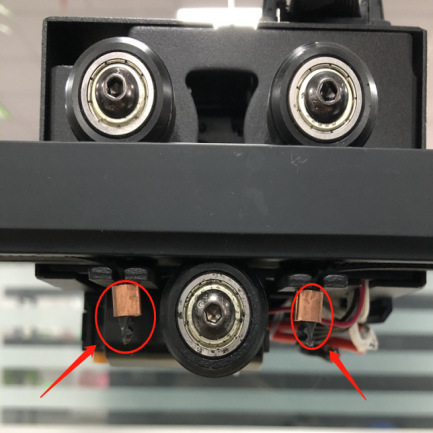
Step 10: Fix the copper buckles at both ends of the belt to the sheet metal of the print head module.
Step 11: Install the nut for adjusting the tightness of the belt, and screw it to the X-axis tensioner in a clockwise direction. By the way, adjust the belt to make the print head module move smoothly on the X-axis carriage.

Step 12: Take out the motor cover placed aside, and use the M2.0 Allen key to tighten the 2 screws behind the X-axis motor cover.

Step 13: Plug the printhead cable into the printhead module.