It must have been an exciting experience to receive the first FDM 3D printer. General desktop FDM printers require simple assembly. Don’t worry, the installation instructions, assembling the printer will not be a very troublesome task, and there may be some fun of manual operation. But how to use an FDM 3D printer? I believe that people who have just received the first 3D printer will be a little overwhelmed. So this guide will show you step by step how to operate an FDM 3D printer, it is not difficult to handle.

Preparing to Use an FDM 3D Printer
In fact, besides the preparation of machines and materials, there is another important thing to do: prepare the model and slice files. What is 3D printing? In simple terms, 3D printing is a process of reducing a digital model into an object by means of a 3D printer. So we need to prepare the 3D model file we want to print, and the g-code print file that can be recognized by the FDM 3D printer. For beginners, we give you these two keys:
Thingiverse is a website dedicated to the sharing of user-created digital design files, providing the free open source hardware designs, sharing a large number of models that can be used for 3D printing. Many people here support their favorite models and discuss the fun of printing.
Cura is an open source slicing application for 3D printers, which is very popular among FDM printing enthusiasts. It is able to meet the basic slicing needs as well as having very personalized settings with many parameters that can be adjusted.

Tutorial Step by Step: How to Use FDM 3D Printer
Step 1: Run the Machine
Check the printer installation, plug in the power cord, turn on the printer and just run it. You can get to know the printing functions of the printer on the menu and get familiar with the basic operation. If there is an instruction manual here, then read it to gain more understanding of the printer and its necessary precautions.
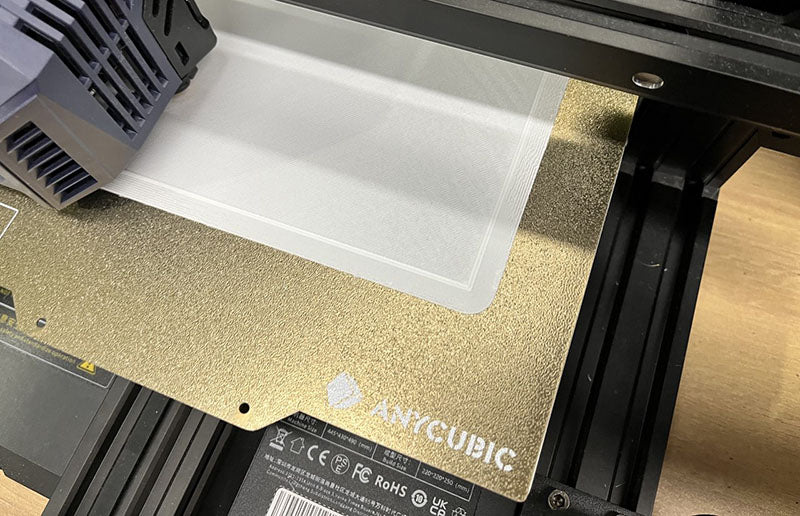
Step 2: Leveling the Print Bed
If the printer is equipped with auto leveling, then this step will be very easy, find Auto-Leveling on the menu and click the button. Leveling is a very important step before FDM printing. As the material melts and builds up layer by layer, the balance of the print bed and the steady movement of the z-axis can affect the quality and success of the print.
In recent years, FDM printers have been continuously upgraded. Many entry-level FDM 3D printers are equipped with automatic leveling systems, which can greatly improve the accuracy of leveling. For example, Anycubic Kobra Go is the most cost-effective desktop FDM printer under $200. The automatic leveling system uses 25 point precision detection to perform firmware algorithm compensation, which can solve many troubles for users. Entry-level users can also achieve one-button leveling and easy printing.

Don’t worry if you need to level the print bed manually, it’s not exactly a difficult problem to deal with. You can refer to this guide to help you solve the print bed leveling problem. Typically, prepare a sheet of leveling paper and adjust each of the four corners and the center of the print platform, feeling a slight friction until they are at the same distance form the nozzle of print head. Although it may not be as convenient and precise as an automatic leveling system, it is enough to complete a successful print.
Step 3: Install Filament and Feed It Through the Printer
Attach the filament to the filament holder, insert one end into the extruder, make sure the filament is in the correct position and can be fed through the extruder, then the next step is to feed the filament. The nozzle will be heating to 230℃, filament will be extruded from the nozzle, it can sure that the filament will be extruded successfully when the process of printing.

Commonly used filament for FDM printing are PLA, ABS, PETG, etc. The most suitable for beginners is PLA which is popular because it is almost it is almost the easiest to use and renders very good results.
Step 4: How to Adjust Temperature of Nozzle and Print Bed
Select the model you want to print, then heat the nozzle and the print bed to high temperature. Different materials need to be heated to different temperatures. For example, PLA filament is printed at 190-210°C. If the temperature is too high, the melted filament may clog the nozzle when the printer is working. However, the printing temperature of other materials, such as TPU, usually requires 230°C.
The temperature of print bed is also determined by the printing material. PLA can print models normally even without heating the print bed, but we usually set it at 60-70°C to ensure the adhesion of the printing platform and the success of the first layer of printing.

Step 5: Observe the First Layer and How to Adjust the Z-axis
Select to start printing, when the nozzle and print bed are heated to a suitable temperature, the machine will automatically start to run, observe the printing situation of the first layer, such as whether the nozzle moves normally and whether the consumables are extruded. When the material is attached to the printing bed, the compensation value of the Z-axis can be adjust according to different printing effects:
- If the filament is very thin and the consumables are intermittent, the nozzle may be too close to the print bed, or the extrusion force of the extruder is insufficient. At this time, the Z-axis height needs to be increased.
- When the distance between the nozzle and the platform is too high, the extrusion of the material is smooth, but it cannot adhere to theprint bed well, the z-axis height also needs to be adjusted. At this time, the Z-axis height needs to be lowered.
After confirming the printing status of the first layer, the subsequent steps will run stably on the printer and build the model layer by layer. All we have to do is wait. If there is no warping, the model is firmly adhering to the build platform, and the nozzles are extruding filament normally, then our prints will have a good chance of success.
3D printing is a very interesting thing, and it also attracts more and more people to become enthusiasts with its unique charm. FDM 3D printing often shows its surprising creative space. During the printing process, some troubles may need to be solved, or more patience may be needed. In the end, the most beautiful moment is when you take the work off the printing platform, isn't it?
Related Articles:
Tutorial FDM 3D printing: How to Remove 3D Print from Printer Bed
How to Clean 3D Printer Nozzle: 3 Methods to Fix Clogged Printer Nozzle